I have owned a Schacht Ladybug spinning wheel since that day in 2010 when Jim from Yarn Barn Of Kansas helped me choose it at the Albuquerque Convergence. I use it frequently to ply my Harrisville singles yarn together when I want the colors quite well mixed. But I realized recently when I had some glitches with the wheel drawing and was futzing with whorl sizes that I barely know what the parts of a spinning wheel are called much less how to use it properly. If I hadn't done a crash review of part names before I went to visit the Schacht Spindle Company last month, I would have looked at Denise with a little bit of trepidation when she asked about my mother-of-all.
During that fateful visit, Denise mentioned that Maggie Casey, co-owner of Boulder's Shuttles, Spindles, and Skeins was teaching a beginning spinning class soon. It was further impressed upon me what an unmissable opportunity this was and that the classes filled up right away. I signed up. Even though it takes 75 minutes to drive to Boulder. Even though the classes go until 9:30 at night. Even though it is winter and a snowstorm could jeopardize any of the 6 classes. Even though my proverbial plate is full to overflowing with tasks. I want to spin and it couldn't wait.
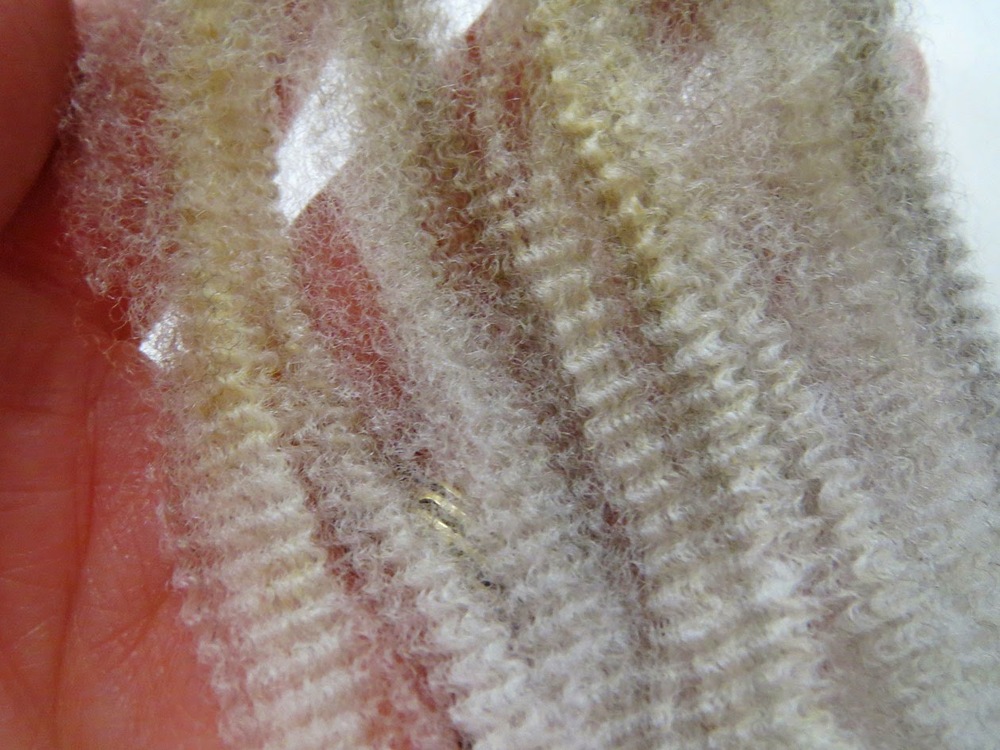
Last night was the first class. Maggie brought this Corriedale fleece for the 8 of us to split. I never knew fleece looked like this right off the sheep.
I was hooked even after hearing the word carder uttered. Somehow it hadn't occurred to me that there were steps between sheering the sheep and spinning. Carding seems to be a big one of those steps.
Maggie is a great story-teller and I left with a drop-spindle partly filled with inexpertly spun wool and a head full of sheep stories. I'm washing the fleece right now and can't wait for it to dry so I can practice with the drop spindle some more.
While listening to Maggie tell us how she scours her fleece and that she uses laundry baskets with holes all around--impossible to find any more, I searched my mental house for something I could use. Then I remembered this. The first stainless steel dye pot I bought many years ago was intended to fry turkeys. I never understood why anyone would dunk a turkey in boiling oil to cook it, but apparently many people do because Cabella's sells a lot of equipment for this pursuit. I never had a use for the inner bucket with holes... until now. I give you my new fleece-scouring apparatus, used these many years as a studio trash can.
Now if that fleece would only dry so I can practice with the carders and drop spindle! Maggie wants us to start on the wheel next week and I'm hopelessly unprepared.
I got home yesterday from a great two week vacation. I spent a lot of time with these people...
Four goofballs pulling a sled with two tiny urchins. The sled was made for me when I was a baby in Alaska. Needless to say, it is old.
Marshmallow sculptures were made though it should be noted that Emily roasted hers over a candle and made tiny smores.
Stella. She has a tongue problem.
I can still hear, "My bad Rashad!" and "I know, right?" echoing through my head courtesy of this one-year-old. A snappy come-back is absolutely necessary with four older siblings.
New Mexico was freezing and Mississippi was warm and rainy. There were bubble machines in the vet clinic and cats in the chimney. MRSA barbie made an appearance next to Princess Elsa from Frozen (times two) and the family quarrels were kept to a low hum. We played board games and ate too much processed cheese food. It was great.
I've got the post-vacation blues today. The house is full of half-unpacked bags and the Christmas lights just aren't as cheery. I knitted about 30 of those little wine cork trees either because I missed my loom or I was trying to stay awake through the 7th episode in a row of Pretty Little Liars. Either way.
Learn tapestry weaving in a supported environment online from home
Does the art of tapestry weaving fascinate you but you're just not sure where to start?
Do
you enjoy collaborative workshop environments but find when you get
home you don't weave again until the next workshop comes along?
Do
you get frustrated by not understanding why your edges are drawing in,
your fell line is as wavy as the Atlantic in a hurricane, you can see
those white dots of warp peeking through, or you have big ridges in your
fabric?
Are you fond of attending intimate workshops with the
opportunity to ask questions, receive personal feedback, and time to
work through your ideas?
Do you love tapestry weaving but find yourself stuck with just how to express your visual ideas?
If
so, you may be an ideal candidate for my online tapestry techniques
course, Warp and Weft: Learning the Structure of Tapestry.
I understand where you're coming from...
For
years I struggled to put together the bits of knowledge I had gleaned
from various sources. My learning was fragmented and came from
occasional workshops and the few existing tapestry texts, many of which
contradict each other. I longed for some solid guidance.
I was
fortunate to be invited to apprentice with James Koehler, the late
master tapestry artist from Santa Fe. The regular, scheduled practice of
tapestry in his studio allowed me to build my skills in an environment
that offered frequent feedback and constant incentive to keep working
and learning.
I have built this online class with that model in
mind. I teach many in-person workshops and love meeting students in a
face-to-face context. But I find that when they go home they often have
many questions and when the next workshop is six months away, they often
put the loom on a shelf.
Your course has motivated me to actually weave in a
way that none of the books I have bought over the years have done. It is
well-organized and filled with important and inspiring information. — Nancy Nordquist, Woodlands, TX
How did this program come about?
As I
watched tapestry students come to my workshops with the work on the loom
from whatever the last workshop they took was, I realized there had to
be a better way to learn tapestry weaving.
I wanted to create a
learning environment more like what I experienced as James Koehler's
apprentice... one that extended over a good chunk of time with
consistent feedback and the ability to ask questions at any time.
I really don’t think I’ve ever had so much fun
learning how to weave. Rebecca is always right there to answer our
questions and discuss any problem we might have and she will keep at it
until we get it. I love this format, not only because I can sit at my
loom any time night or day, but I don’t feel like I’m holding others up
like in a workshop. — Michele Dixon, Seguin, TX
Does it work?
Yes!
Here is one video of student work. Many of these students had never
woven tapestry before and some of them had no experience with fiber at
all. There are more videos linked at the bottom of this page for the
curious.
What does Warp and Weft: Learning the Structure of Tapestry include?
Printable PDF handouts with exercise instructions, diagrams for the techniques, photographic examples, and design ideas to try
Extensive video teaching. All techniques are demonstrated, often more than once
Troubleshooting: videos and handouts explain common problems you might encounter and demonstrate how to fix or avoid them
Discussion with
fellow students all over the world helps clarify potential problems and
solutions as well and share more general understanding of tapestry
practice
Continued bonus material throughout the class created
by me in response to your particular questions. (This feature is not
included in the Self-Directed version of the course.)
Feedback: the opportunity to submit photos of your progress, problems as you have them, and questions From
these photos I am also able to give you feedback on something you may
not see as a problem yet and show you how to fix it before it becomes
obvious and frustrating. And most importantly, you will get feedback
about what you are doing that is successful. (This feature not included
in the Self-Directed version.)
Invitation to a secret Facebook
group where students in the program and those who have graduated can
continue to connect over a virtual cup of tea.
The pieces that are being woven during this class are a great source of inspiration. — Barbara DiTrani, North Bend, WA
Who this course is for
people who have never woven tapestry before--if you can get your loom out of the box, I can help you from there
people
who have some knowledge of tapestry but need a structured review of
foundational principles and encouragement to design their own work
people
who want to learn tapestry techniques and are committed to practicing.
The best outcomes are to students who can commit a few hours a week to
study and weaving or who can block out larger chunks of time at some
point during the course.
people who benefit from a structured outline of learning activities to achieve their own unique outcomes
people who want to give themselves the gift of time to learn a wonderful fiber skill
Who this course is NOT for
people who do not have the necessary computer systems or knowledge to access the course (see technical specifications below or contact me for more information)
people
who do not want feedback about their work. It is my job to teach and I
will do it. (Hint: In this case, the Self-Directed version might be for
you.)
people who don't appreciate my silly sense of humor. It
comes out in the videos, though primarily in the outtakes at the end. If
you can't put up with my upbeat, cheerful humor, this course isn't for
you. THIS video has an outtake at the end that is an example of this silliness.
I
have been accused of being a cheerleader, though I was the geeky
clarinet player in the marching band and have never owned pom poms. I am
not going to say to you, "Your selvedges are crap, fix them." I will say, "You
seem to be struggling with keeping your selvedges straight. Here are
some things to try to improve that. Let me know what works!" If you
are looking for the same kind of teaching you got from your scary high
school physics teacher, this isn't the course for you.
Technical specifications for the course
This course is hosted in an online platform called Pathwright.
It is designed as a linear path that steps you through the learning
process one piece at a time. There is an overall menu that you can
return to at any time to skip backwards or forwards as necessary.
It
is largely video-based. If you pay for your internet services by the
gigabyte, this course is not for you (unless you don't mind paying). You
can turn off the HD feature of the videos, but they still use a lot of
streamed data. If you are able to view standard YouTube videos, you will
be fine.
This course does work on iPads and is compatible with Mac or PC. It does not work on mobile phones.
Browsers:
Safari does not work well though most features work on iPad.
Pathwright recommends Google Chrome or Mozilla Firefox, both of which
are great browsers and are free to download. If you don't understand
what I just said, this course is not for you.
My only hesitation about taking this class was my lack
of intuitiveness when it comes to technology. Technology things that
seem obvious to younger people are never obvious to me. I found the
Pathwright platform to be simple and easy to use. — Vicky Standley, Georgia
Here are a few results you can expect from taking this course
understanding of basic and some intermediate tapestry techniques
how to use weaving equipment including looms, yarn, and hand tools
examples from the work of tapestry weavers past and present to illustrate the concepts you are learning
suggested readings about design and the practice of tapestry
introduction to design especially in regard to what is weaveable
increased confidence in your tapestry weaving skills
samplers from each of the three parts which you create as you practice the techniques
completed small format tapestries from each of the three parts
connections
with new tapestry weavers all over the world and the opportunity to
continue those interactions after the course is over
The Options and The Investment
There are three ways you can take this course:
All-Three-In-One
With
this option you get all the material in one class. The course is
divided into three parts, but they are all available to you from the
first day. You can work through it at your own pace and I will meet you
wherever you are in the curriculum for teaching and troubleshooting. You
also have the advantage of being able to skip ahead to videos presented
later in the course. This class lasts six months. The price is $595.
Parts 1, 2, 3
You
can take each of the three parts separately, registering for each as
you're ready. The course is designed to be taken with the three parts in
sequence and with that in mind, you have six months of access to Part
1, five months for Part 2, and four months for Part 3 with all three
parts ending on the same date. It is completely acceptable to take Parts
2 or 3 at a later date when you are ready. The price is $220 for each
part.
Self-Directed
This is the same class as the
All-Three-In-One course but with no teaching or discussion from me. You
won't get the bonuses I make in response to individual questions and you
won't be able to submit images for feedback. Some people learn very
well this way however, so if this sounds right to you, this might be
your option. The price is $395.
I am always a little budget conscious, so I paused to
consider the price. I also wondered if I would have the time to keep up
with the class as a working mother of two small children. However, I now
think the price was well worth it and really actually a bargain for all
the value I got out of it. — Julie, Orinda, CA
Where, What, and When
All-Three-In-One: Starts January 5th, 2015. Registration with preliminary information available right now.
Part 1:
This class is currently open and because I made a big goof on the
dates, it goes until June 30th, 2015. Register and start today!
Part 2: Starts January 5th, 2015. Registration with preliminary information available right now.
Part 3: Starts February 11, 2015. Registration with preliminary information available now.
Self-Directed: Starts January 5th, 2015. Registration with preliminary information available right now.
I
will be offering these courses at most twice a year. Reserve your space
today. The next opportunity will be in September of 2015.
Refund Policy
I
believe in the efficacy of my course. If, after the class starts, you
find it is not for you, I will refund your investment, no questions
asked. You have seven days from the start of the class to make this decision. I do not give refunds after that seven day period has passed.
Space in these classes is limited! Reserve your spot now.
The link below will take you to the registration page on the
Pathwright platform. From there, you can use your credit card to
register through Stripe.com (works like PayPal) and have instant access
to the preliminary information for the course.
If you have problems with registration, please don't hesitate to contact me HERE.
What happens after you register?
The
dates posted in the Pathwright program will look like the class has
already started. This is because I have to set the start date when I
open the class for registration to give you access to preliminary
information in the course. The rest of the material opens on the start
date given for the class. When you try to access the material before the
class starts, you'll see the page greyed out and a clock timer counting
down to the moment the class opens. Like this!
As
soon as you register you can go to the Pathwright class platform and
view the preliminary information. There are videos about tools and
materials you'll need and how to navigate the platform. There are also
some PDFs with more detailed information and some welcome information
about the program.
There are instructions about how to warp your
loom once the class starts. If you don't have enough time to get all
necessary materials before the start date of the class, that is just
fine. You have enough time to order and receive supplies and still
finish the class.
I love teaching and have enjoyed all the wonderful students I have met in this course so far. I hope to meet you online soon!
All my best,
FAQ
Do I get access to the course forever?
No.
I designed these courses to mimic an experience of working with a
teacher over a period of time--six months in this case. I want you to
focus on the material and work through it for a fairly short amount of
time, building a consistent weaving practice.
This course was not
designed as reference material. It is an experience somewhat like a
college course (but without the grades!) from which you will learn
enough to weave your own expressive art. Also, I can't guarantee I will
offer this course "forever". There will be new courses that take its
place and I can't promise maintenance of this one beyond the schedule on
my website.
This class has been akin to an art college course; I have learned more than I could have imagined. — Liz Johnson, Freeport, ME
I can't picture how the course works. Can you give me a better understanding of what I will be doing?
The trailer video below as well as THIS
video show you the Pathwright program and give you a good idea of what
the activities in the course are like. There is a list of more links at
the very bottom of the page.
Does the class work on a set schedule?
No.
The material for the entire class for which you are registered will be
available from the first day. You may work through it as quickly or as
slowly as you wish. Of course if you are registered for Part 1, you
won't be able to access Part 2 until you register and the class starts.
The All-Three-In-one and Self-Directed options give you all the material
at one time.
What have students who have taken the class already said about it?
I have a long list of student reviews on THIS page of my website as well as multiple videos of their work.
I like how you continued to update the videos or
handouts in response to specific questions people had and also posted
other people’s ideas. It makes the class feel like a “real” class rather
than a virtual one. Your prompt feedback is also extremely valuable and
made me feel like I was in a class. — Julie, Orinda, CA
What if the world crashes down around my ears and I am not able to complete the course in the six months?
Let's
hope this doesn't happen, but if it does, I offer a crazy, unbelievable
discount on the second registration for a course you've paid for once.
If something major happens and you don't have time to access the course,
you can register for 75% off the initial price at another time.
I am not very good at "coloring within the lines". Do I have to do things your way?
No.
My goal is to provide experience with basic tapestry structure and
technique and encourage you to build your tapestry practice in whatever
way suits you. I weave from the back on a Harrisville rug loom, but the
class demonstrations are woven on a Mirrix because it is easier for you
to see. I present ways to weave both from the back and the front and you
can choose which is best for you. I also present opinions of other
tapestry artists in regard to technique and encourage you to experiment
with different methods depending on what materials are available to you
and what your interests are.
Do you offer a DVD version of the course? I live off the grid and don't have fast enough internet to stream video.
No.
Right now this course is designed for this particular online format.
That isn't to say I won't offer it on DVDs eventually, but it isn't
available now.
I have another question and I didn't hear you address it...
Please email me! I love answering any and all questions. Just don't ask me what the meaning of life is. CONTACT ME HERE.
The course video trailer
This short video gives you an idea of what the course will be like with some glimpses of the Pathwright program.
Need more information? Here are some further links.
Sign
up for my email newsletter for updates on the online classes,
interesting information including free videos, and all the details of
what kind of fiber mischief I'm up to in the world. CLICK HERE for the twice-a-month newsletter. You can opt out any time.
On the last day of 2014, here are some of the blog posts that people read the most this year. I'm not saying they were the best posts because some of those were cleverly disguised under headlines that did not sparkle and you did not read them. Click on the post title to see the full post. The posts about tapestry tools and methods A Dozen Gift Ideas for Tapestry Weavers
This was a list of some of my favorite tapestry things. I hope Santa made good use of the list this Christmas.
Tapestry Looms: what do you use?
You were very interested in this post about tapestry looms. I have the follow-up post in progress with all of your responses. Stay tuned!
Making yellow into blue. Color Gradation in yarn.
I taught my Color Gradation Techniques for Tapestry class several times this year. The first time was in my Santa Fe studio to a great group of students largely from the Pacific Northwest. There are many photos in this post of the wonderful things they did.
The posts about famous tapestry weavers and their methods Jean Pierre Larochette, Yael Lurie and The Tree of Lives
I finally met Jean Pierre and Yael this year. I heard them speak about their new book and of course bought a copy. I enjoyed it thoroughly and it gave me a perspective on contemporary tapestry weaving in the USA that I didn't have before.
American Tapestry Biennial 10, San Diego
As one of the co-chairs for ATB10, I wasn't going to miss the opening in San Diego. This post has a video tour of the show and many photos of the tapestries.
Anna Kocherovsky, Wishing Well
Desert Horizons with Joan Baxter
I had the good fortune of taking a class with Joan Baxter at Ghost Ranch in New Mexico this year. The week was one of the best of the year.
James Koehler's Tapestry process... the last video
This post has a video made in 2010 not long before James died. It shows his process and you get a little flavor for what his studio is like. Posts from my head... and these aren't even crazy pants
Warp and Weft enters a time warp... Timeline for all classes extended. A lot.
There have been a handfull of posts about the online class this year, but this is the one you all read. Probably because you were excited I extended the time-frame for the course. I designed each of the three parts to be done in about a month, but that length of time proved insufficient for many people. So I made the course 6 months long (except where I make mistakes like the current Part 1 class--it has been open since October and still has 6 months left--so sign up now!)
Crushing the butterfly
I love Ann Patchett's writing. In her book of essays, This is the story of a happy marriage, she talks about what it is like to make art. I think we can all relate.
Still in Providence... A couple tapestry shows
I spent a great deal of my summer preparing for Convergence and then teaching. I wrote quite a few blog posts while in Providence. This is the last one. About the time I wrote this I thought, "I'll never do this again. I'm too tired." But with the blessing of time and memory loss, I can now say I'll go back.
Louise Martin, Looking Out. This was my favorite piece in the Untitled/Unjuried ATA show
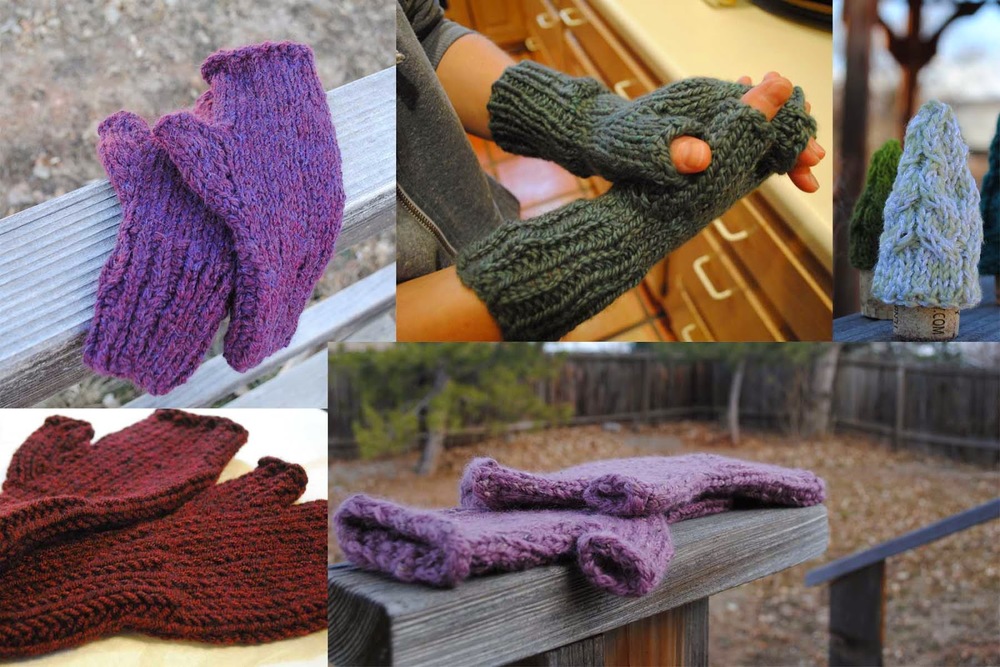
There was a lot of knitting this holiday. For whatever reason, my brain kicks into knitting obsession around the end of November every year and I churn out some small project in multiples. This year there were several. I will admit that I have trouble with big knitting projects. I can happily plan and execute a very large tapestry and never lose my mojo, but actually finishing a knitted sweater is like climbing Mt. Everest. I have a bin under my bed with THREE sweaters that are completely knitted and just need to be blocked and sewn together. They have been there for years. No, small is the right size for me.
It started with the tiny trees. I ran out of wine corks (amazingly), but between my mother, sister, and sister-in-law, I now have enough corks for years to come. A forest is what I'm going for here (and to use up the bags of odds and ends of knitting yarn clogging my closet).
You can make some yourself. The pattern is by Julie Tarsha and you can find it on her blog HERE.
There were some knitted stars for my niece's Christmas tree. (Pattern is Stjarna by Karolina Eckerdal.)
Then there were the fingerless mittens. Thus far I have made five pair. I am out of yarn, so I might be done. The pattern is Super Bulky Fingerless Mittens by Spider Laurence.
And the baby hat and leg warmers...
There is another pair of leggings in process for another niece, but I didn't quite get enough knitting time on the drive across the country to pull them out.
I also put the Zoom Loom to good use making blankets for my 2-year-old niece's little people. I had to sew some together because "their feet are so cold". The only photographic evidence of these blankets seems to be this photo where the baby is wearing one on her head. The wool stuck nicely to her wispy hair. And yes, that is Santa Claus in the background putting together a new workbench for the older niece on Christmas Eve.
My Aunt Mary Lou loves to make dolls, and this one appeared under my mother's pint-sized Christmas tree for a couple little girls. Lulu is a marvel of details. She has a tattoo on her back that says Merry Christmas 2014 and an embroidered heart on her chest. My aunt knows her way around a sewing machine.
And I received a wonderful quilt from an old friend commemorating my dog Cassy who died about a year ago. Kristi knew Cassy when she was a young dog and she gathered photos of her and sewed this quilt.
A better handmade holiday has never been had. Bring on the fiber, it is only 360 days until Christmas.
I have a whole stack of my grandmother's Harriet Tidball monographs. I am no longer a fabric/yardage type of weaver, but I hang onto these partly because they were grandma's and partly because, well, I can't get rid of old, interesting things.
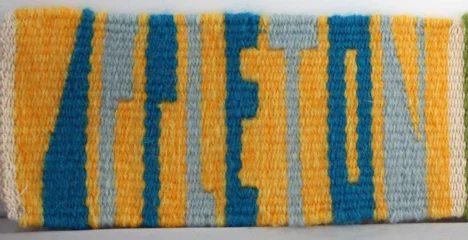
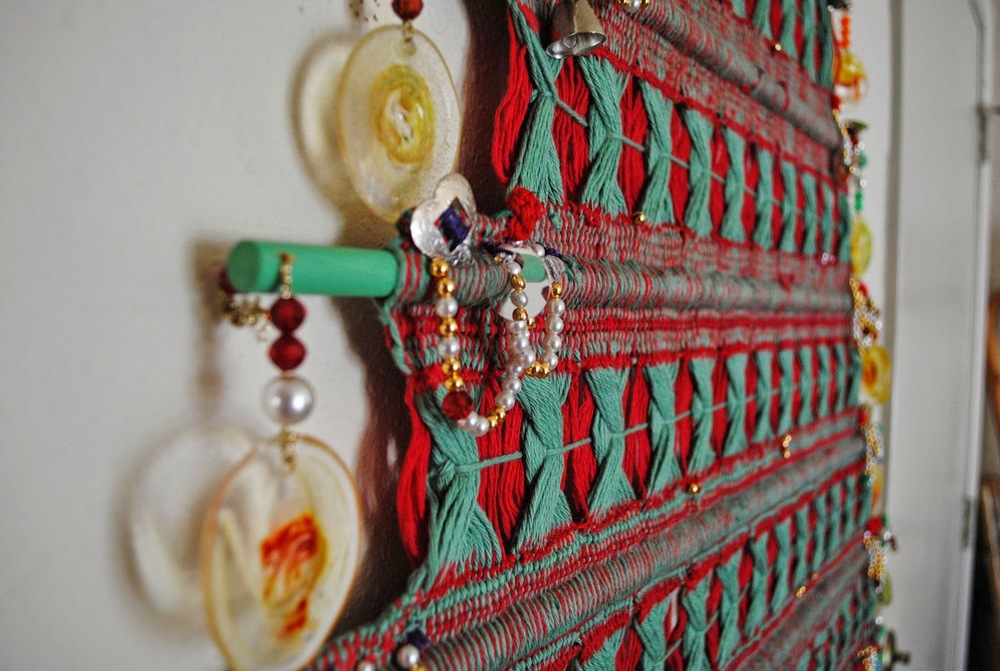
My grandmother did a little decorating for Christmas and the most notable ornaments were long twisted things made by using a thick narrow warp and weaving metal rods in decreasing lengths as weft. When off the loom, the whole thing can be twisted and it stays. Grandma Marian would then decorate the rods with glitter glue and sequins and then twist them. They were hung all over her house every Christmas (along with the beautiful glass tree ornaments from Europe into which she had scratched my grandfather's social security number in case they were stolen--that Grandma Marian is really something).
Today while flipping through the Tidball monograph, I realized that the pattern for this decoration came from this very publication. Tidball instructs making tiny 4-inch decorative trees, probably to hang as a real Christmas tree decoration.
You can see by my grandmother's annotation on the photo of the small trees what she thought of them.
Yet I can tell you she loved the large version of these which are essentially made the same way.
Her trees were a couple feet high and hung from the florescent light banks in their living room (light for weaving!). Unfortunately I can't locate a photo of these crazy beauties.
Here are the instructions in case you want to make your own. If you try it, will you send me a photo? The first page is to make the small ones my grandmother thought were awful. The second gives you an idea how to make the larger twisted variety.
The monograph, should you have it on a shelf somewhere, also has some lovely ideas for making woven Christmas cards. Maybe one day when I have a little down time I'll give that a whirl. I'm sure I can find a free loom somewhere around here for that project.
Merry Christmas Handweavers!!
Update 12/24/14: A excavation expedition was mounted to my parents basement and one of Marian's decorations was uncovered. We didn't discover any of the twisty trees, but this one was hanging over her fireplace every Christmas for many years.

 I was hooked even after hearing the word carder uttered. Somehow it hadn't occurred to me that there were steps between sheering the sheep and spinning. Carding seems to be a big one of those steps.
 Maggie is a great story-teller and I left with a drop-spindle partly filled with inexpertly spun wool and a head full of sheep stories. I'm washing the fleece right now and can't wait for it to dry so I can practice with the drop spindle some more.
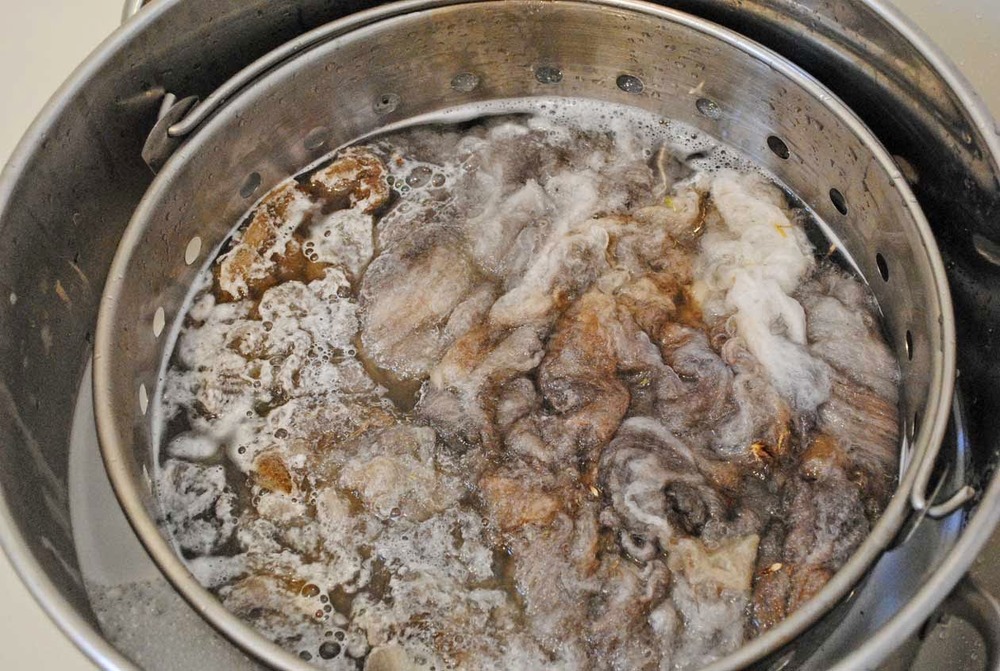
 Now if that fleece would only dry so I can practice with the carders and drop spindle! Maggie wants us to start on the wheel next week and I'm hopelessly unprepared.