
The American Tapestry Alliance’s media tour kicks off today. This year they’re holding it on Instagram and I am kicking off the week with a day of posts about tapestry looms. You can see the posts on my Instagram feed HERE. You do not have to have an Instagram account to go there and look at them. All the information about the next days of the tour is in those posts and also at the end of this email with links.
Today is my day on the tour and I wanted to use this blog post to provide more information and links. The video in this post is one I did for the Instagram stories today.
I wanted to talk some about choosing a tapestry loom. Most people who jump into tapestry outside of a university fiber art program start with small tapestry looms. I’ve written articles on this blog about looms (three of them are HERE, HERE, and HERE) which focus on what looms are out there and why some are better than others for tapestry weaving.
There is another consideration when choosing a tapestry loom and that is the sort of images you want to weave. Some looms are much better choices than others depending on the style of weaving you want to do. Of course if you’re a beginner and you just want to try your hand at this medium, a well-constructed version of any of these looms would be a good starting point. But once you have a little experience, think about whether your equipment serves your aims as a weaver.
A loom is just a mechanical means to hold a series of threads called warp in place while the weft is woven across them. How the equipment does that varies with styles and sizes of looms. A tapestry loom can be as simple as a picture frame or as complicated as a countermarche floor loom.
The three looms below look very similar, but there are some subtle differences. The loom on the left is a picture frame from Goodwill. It cost $1.49. If you are going to go this route, please at least choose a frame that is sturdy! With careful warping, this loom works for small tapestries. The second photo is the Glimakra Freja loom. This loom has tensioning. Look carefully at the top of the loom. There are wing nuts that adjust the tension on the bar with teeth to which the top of the warp is attached. This is a simple wooden loom that has the advantage of at least some moderate tension. The last photo is a travel loom of Lynda Teller Pete, a traditional Diné weaver. This loom also has a wooden frame but tension is provided by the three turnbuckles you can see at the top of the loom. This loom is also warped Navajo style which is a form of four-selvedge warping. All three looms are simple. The second two provide tension. The third provides the tightest tension.
Picture frame tapestry loom
Glimakra Freja loom
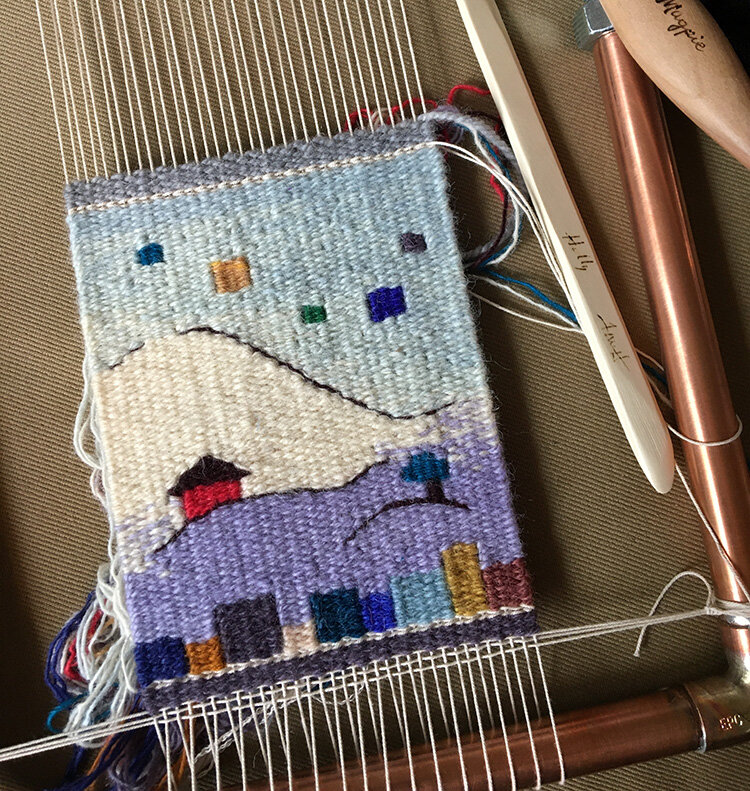
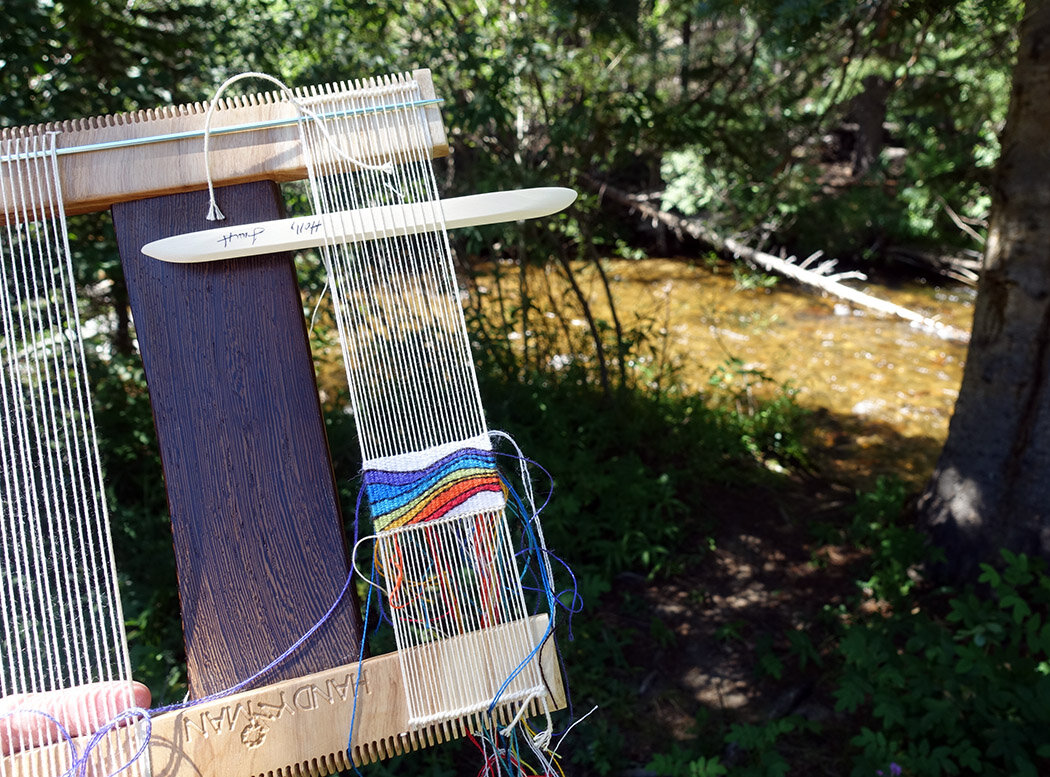
Lynda Teller Pete’s portable Navajo tapestry loom. (Make sure to get that book that is in the photo! It is gorgeous. Spider Woman’s Children by Lynda Teller Pete and Barbara Teller Ornelas.
Here are some things to think about when choosing a loom:
Size
Mirrix Lani loom with weaving line near the bottom of the loom.
It is pretty obvious that if you want to weave a big tapestry, you are going to need a big loom. You can weave a small tapestry on a big loom, but weaving a large piece is going to mean a bigger piece of equipment. It is easiest to weave if you have free warp above your project. It is easy to assume that if you get a loom that is 7 x 8 inches you can weave a tapestry 7 x 8 inches. That isn’t true. You can attempt to weave over the whole surface of your warp, but you will struggle a lot in the later parts of the weaving. The less free warp there is above your weaving, the more difficult the weaving is. On very small looms, you won’t have a choice and you may only have a couple free inches above the weaving. If possible, leave more space. 12-18 inches is a wonderful amount of warp to have above your weaving line and it is possible to achieve this on most varieties of pipe loom including the Mirrix.
Notice how much free warp above the weaving there is on the Mirrix loom. If you’re using a loom with a continuous warp that can be advanced, it is easier to weave with the fell line near the bottom of the loom and it is better for your body than reaching higher or farther away from you to weave.
Tension
I talk about tension in tapestry looms a lot. I do know a few professional tapestry weavers who like their warps very floppy, but in general, most weavers like having their warps held quite tightly. For small looms without tensioning devices, using a cotton seine twine warp can be helpful because it is slightly stretchy and it is easier to maintain a better tension over time than with something like linen which seems to loosen up. But once the warp gets longer than about 12 inches, I much prefer a loom with tensioning. This can be as simple as a pipe loom or as complicated as the brake mechanisms of many shaft looms.
The loom that I see a lot of people trying to use for tapestry that I feel falls short is the rigid heddle loom. These looms are fantastic for weaving all kinds of cloth. It is astounding what you can weave on this simple piece of equipment. But the small beams and plastic teeth that most of them have do not allow these looms to hold a high tension. That is a general statement and I am sure there are exceptions, but if you want to weave tapestry, I recommend getting a different kind of loom.
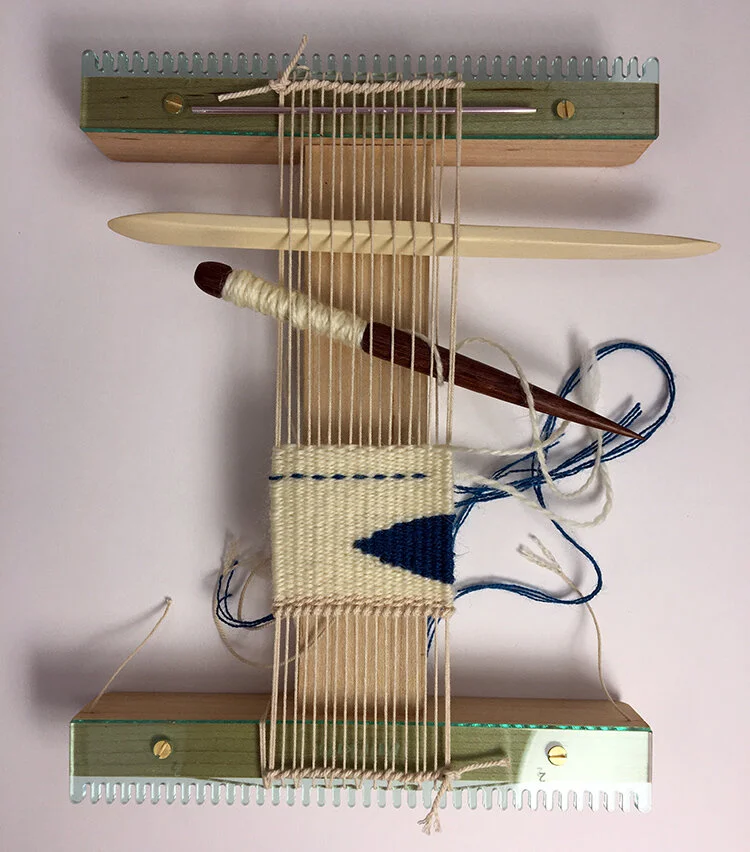
A simple home made copper pipe loom with a small weaving on it. The threaded rod in the middle of the loom is how tension is applied to the warp. The two nuts on each side are screwed away from each other making the loom longer and putting adjustable tension on the warp.
Shedding mechanism
Some looms have a way to change the sheds and others do not. A shedding mechanism can speed up the weaving especially if it is controlled by the weaver’s feet. But many people weave everything by picking the shed. In the image of the Mirrix above you can see the shedding mechanism. It is the copper bar that has a black handle on the side. Other looms have treadles for your feet to change the shed. Most horizontal floor looms work this way. High-warp tapestry looms sometimes have treadles and sometimes don’t.
Space
If you want to weave big tapestries and you live in a studio apartment, your options are more limited. I have heard from many weavers who replace their formal dining room table with a loom. (And I’m all for that idea! Take company to a restaurant or do what I do and only have people over when it is warm enough for us to sit on the deck.)
If you want to weave large tapestries but you don’t have a lot of room, consider an upright tapestry loom, or if that still takes up too much space, a scaffold or pipe loom. Pipe looms can be made very large, they have less of a footprint and can be used as a room divider or pushed against the wall. And when there isn’t a tapestry in progress, the pipes come apart and you can put them under a bed.
If you want to weave large things and you have space for a countermarche floor loom, by all means look at the Harrisville Rug Loom, the Cranbrook, or one of the fantastic Scandinavian countermarche looms. If you want a little bit smaller footprint in a floor loom, a Leclerc counterbalance or a Macomber jack loom are both great choices.
Style of weaving and the equipment you’ve chosen
I have a theory that I have not scientifically tested, but let’s entertain it for a moment. The way that the equipment forces the weaver to work is the basis of my theory. I wonder if people who weave on upright tapestry looms or smaller lap looms that do not have shedding mechanisms or at most have leashes, weave in a more graphic style. By that I mean that their images tend to have more areas of solid color and less techniques like hatching or interlocks.
Sarah Swett holding a bobbin in her right hand. She picks the shed with her left hand, holds it open, then puts the bobbin through with her right and beats the weft in. Sarah is posting on the media tour on January 21 and you can find her at @sarahcswett
It is my observation that tapestry weavers working on upright looms where there is not a shedding mechanism based on shafts or heddles (like the Mirrix), tend to be bobbin users. These weavers have one shed that is held partway open with an open shed rod. The other shed is created when the warps that are behind that rod are “picked” and drawn in front of the front layer of warps to put the bobbin through. Because these weavers are using one tool, the tapestry bobbin, to put that weft in and beat it down and because picking the shed facilitates working in small areas, I see weavers who work this way building one shape at a time. That is a more efficient way to weave when your shed is opened a few warps at a time and the yarn and tool to beat it in with are held in the hand that isn’t picking the warp. If you weave one shape at a time, of course the shapes can be very small. But I believe there is more of a tendency to use graphic shapes that can all be woven with the color on that bobbin at once.
People who weave on looms with shedding mechanisms that are controlled by their feet or a turning heddle bar like the Mirrix, can open one shed all the way across very easily and often that shed can stay open while the weaver works. This facilitates a kind of weaving that has more hatching or interlocking sections simply because of the mechanics of the loom. This is the way I weave most of my work which is full of hatching and color gradation. I certainly could weave graphic shapes on my looms. But the equipment I use allows me to do a lot more shading than I choose to do on my upright LeClerc Gobelin tapestry loom. That is simply because all that hatching and vertical color grading is easier on the Harrisville countermarche loom and on Mirrix looms due to the shedding mechanism.
Summary
In the end, there are many kinds of looms. If you’re sticking with small format work, the investment in equipment is not terribly expensive especially if you make a pipe loom, so just go get a loom and start weaving. If you want to weave bigger work, the kind of loom you choose might determine what you can weave. Because the investment is much higher in both financial terms and space in your studio, considering the loom you choose more carefully is important. Free looms are not always “free” in terms of how useful they will be to you and what you want to create.
The gallery below contains the images I posted on the Instagram blog tour along with a few I didn’t have room for. Click to enlarge and hover for captions. If you get the blog via email, you may want to visit it online to see the images in a gallery with captions.


Tour information
ATA media tour Instagram stops:
Rebecca Mezoff: @rebeccamezofftapestry
Sarah C. Swett: @sarahcswett
Bridget Fletcher: @bridgetcetera
Patti Kirch: @pattikart
Kathe Todd Hooker: @betweenandetc
Janna Marie Vallee: @everlea_yarn
You can also look at the hashtag #tapestrymediatour.
There are prizes for this tour and if you’d like to have a chance to win one, you do need to have an Instagram account.
Here’s how to enter to win. 1) Follow @americantapestryalliance 2) Comment on a media tour post on one of the accounts above (on Instagram!)
The prizes are as follows and different ones are chosen each day, so you can comment on everyone’s post.
one of five Hokett Tiny Turned Beaters
Rebecca Mezoff’s online course, Weaving Tapestry on Little Looms
a three-month subscription to the online textile school @SchoolOfSweetgeorgia
one of five free entries into @AmericanTapestryAlliance’s Renditions 2020, ATA’s 13th international, unjuried, small format exhibition
one of five free one-year memberships to American Tapestry Alliance.
Share the tour with your friends and followers and we’ll spread the fun of tapestry.
Notes
Archie Brennan along with Susan Martin Maffei have encouraged the use of pipe looms in the USA. On their website are free plans for various kinds of pipe looms.
These three blog posts go into more depth about different kinds of looms. If this post seemed confusing to you, please read through these other posts.
Small Tapestry Looms: Which one should I use?
Which tapestry loom is right for me: Low-warp looms
Which tapestry loom is right for me: High-warp looms
Continue your tapestry weaving learning journey!
I have a ton of tapestry weaving online courses, from Introduction to Tapestry Weaving to Warp and Weft: Learning the Structure of Tapestry to Fringeless: Four Selvedge Warping with Sarah C. Swett to Design Solutions for the Artist/Weaver, and so many more. Whether you’re a brand new weaver on your first loom or an advanced weaver learning to design your own works, you’ll find a class suitable for you.