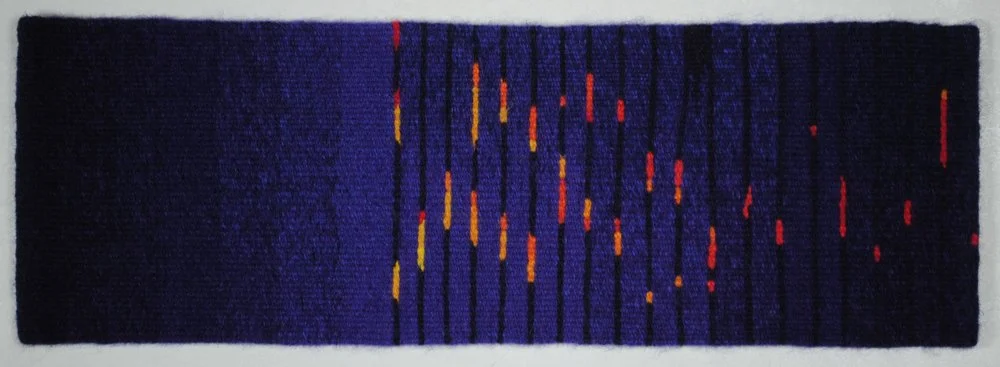
I am thinking about tapestry orientation* this week as the third Tapestry Discovery Box course is released. This class is called Sideways and I thought I’d take the opportunity to show a few of my tapestries where I chose to weave the design turned 90 degrees.
Horizontal lines or low-angled curves in tapestry are easier to make straight than vertical ones. There are only a certain number of warps per inch (8 epi is a frequent sett) whereas you can weave many more sequences in the horizontal direction. This influences how you create a tapestry design and which way you choose to weave it, as it will be shown or turned 90 degrees.
Frequently when creating a design I’ll change the angle of a line if I want it to be rendered straighter since steeper angles are stepped in this medium. So right from the design stage, consideration of what the important elements of a design are and what you’re trying to achieve with the image come into play.
Let’s start with a very old tapestry of mine, Halcyon Days II. I wove this before I started my apprenticeship with James Koehler and from the floor on the image on the loom, I think it was when I lived north of Española, NM, likely 2008.
This tapestry was woven sideways. If you compare the two images you can see that in the finished tapestry the hatching is vertical. It has to be woven sideways to create that effect. The image on the loom makes that clearer.
Halcyon Days II in process, woven sideways. This is on my Harrisville Rug Loom.
Rebecca Mezoff, Halcyon Days II, hand-dyed wool, cotton, in private collection
Another large tapestry I wove sideways is Lifelines. This tapestry is 24 x 72 inches. This tapestry also has that hatching effect that looks sort of “drippy” when you turn the tapestry sideways. I don’t have a loom that is 72 inches wide, so there wasn’t any possibility of weaving that tapestry the other direction at this size.
Rebecca Mezoff, Lifelines, 24 × 72 inches, hand-dyed wool, cotton, in private collection
You can see this tapestry on the loom in the image below. The cartoon is taped to the wall, the yarn is on a table below it, and the tapestry is being woven on my Harrisville rug loom. The spinning wheel is how I ply the yarns to help create the gradations.
Lifelines by Rebecca Mezoff on the loom.
Another piece I wove sideways was Wildflowers. This one was an obvious choice because of the long vertical lines. They could only be woven smoothly horizontally.
Wildflowers on the loom
Below is an image of the piece before finishing. The idea was from the colors of wildflowers seen on my Colorado Trail thru-hike in 2021. I wove some of this piece on Change the Shed and you can find those episodes by looking at the thumbnails HERE.
Barned Burned Down (now I can see the moon) is another tapestry woven sideways. This one is pretty obvious I think. The lines in the piece are all vertical so weaving it sideways was the answer. It also makes gradation simpler.
Rebecca Mezoff, Barn Burned Down, 5 × 17 inches, hand-dyed wool, cotton
I googled this piece to find the dimensions and the AI overview from Google said this (😂):
Sort of correct if you’re not very imaginative I suppose.** I had another piece with a similar title that was not woven sideways. A series of two, here is the other one. Google is probably right that they were woven in about 2013. If I were to weave the piece below again, I would have used eccentric outlines on those horizontal curves. But can you see why I chose to weave the piece below as you see it and the one above turned sideways?
Rebecca Mezoff, Now I Can See the Moon, 5 × 17 inches, hand-dyed wool, cotton
Very often smaller tapestries are woven from the side. Sometimes the technique dictates it such as this simple little piece which uses regular hatching. I was testing a new yarn in this piece and enjoyed making a simple landscape using regular hatching.
Rebecca Mezoff, A Little Bit of Magic, about 4 × 6 inches
And here are two examples I used in my book, The Art of Tapestry Weaving. The tapestry on the left was woven turned 90 degrees from the image. The one on the right was woven as you see it. I discuss the reasons for choosing one orientation versus the other using this piece and others in the Sideways Tapestry Discovery Box course out now.
Lastly, the “It’s Fine” piece I wove on Change the Shed over the last year (and then some) was woven sideways. It finally came off the loom a few weeks ago and you can see me cut it off if you’re in my Patreon. I did an episode of Change the Shed 11/4/26 where I showed the piece and did some of the finishing. The image below is the tapestry before any finishing is done, straight off the loom.***
Rebecca Mezoff, “It’s Fine”, 14 × 14 inches, hand-dyed and commercial wool, cotton
Some tapestry traditions weave ALL their tapestries from the side. It is the tradition in Aubusson France though I’m sure there are many exceptions especially among contemporary artists.
I encourage students to consider what they are trying to express with their tapestry design and use that to make choices about which direction to weave a piece based on which lines can be woven smoothly and which will be very stepped. And understand that having stepped lines is also very tapestry-like and that could be the answer for the image you’re creating.
The third Tapestry Discovery Box course opened this week and is all about weaving your cartoon from the side. If you’d like to explore why and when you’d do this, join me for this fun class online! There is more information on my website HERE along with a registration link. If you’re already one of my students, you can add the course directly from Pathwright HERE.
*And no, tapestry isn’t straight or gay! 😉
**Deep sigh as I avoid talking about AI and the loss of creativity, etc.
***With thanks that the dumpster fire is nearing completion.