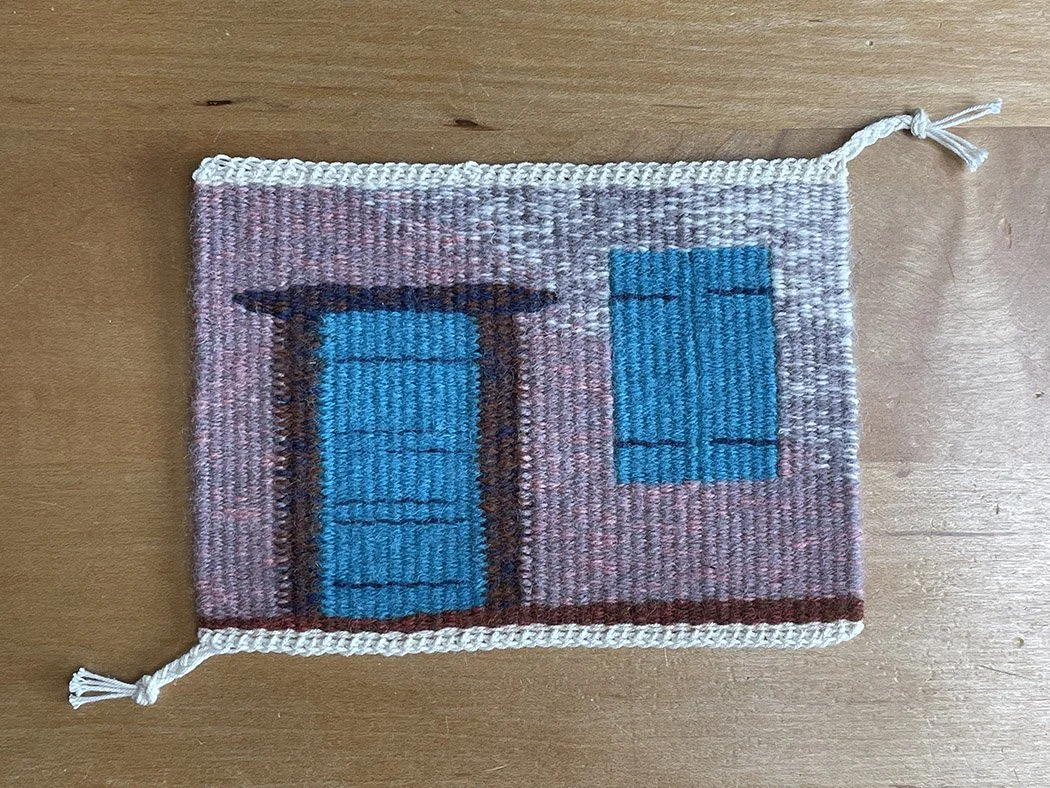
As a teacher of tapestry, one of the most frequent requests I get is for information about finishing. And I don’t just mean how to take the tapestry off the loom and clean it up whether you’re tying or needling in the tails. I mean what do you do with the warps that are left sticking out of two sides of your tapestry?
Think about the finished project before you start
The clip below is from a Change the Shed episode where I’m talking about thinking about how you’re doing your warping and headers before you start a piece because if you don’t, you may not be able to finish the piece as you want. I also put in a plug for experimentation.
If you’d like more information about different ways to do headers, THIS blog post has some more examples as well as thoughts about why headers are important.
Using a braid for finishing your tapestry
I often use a plait or braid to finish my small format pieces if I’m not doing a Fringeless four-selvedge warp.
If you want to do a braid as a finish, you need about 2 inches of free warp at both edges of your work. If you’re using a small loom that doesn’t allow you to leave this much warp, you won’t be able to do a braid. As many of you know, I am always advocating for longer looms and this is one of the reasons.
Considerations when you’re looking at finishing using a braid:
Is your loom long enough to allow you at least 2 inches of free warp at each end of the tapestry?
Do you like the look of that warp-colored edging at the top and bottom of the work? You can use a colored warp and change the color, but you’ll still see it.
Do you like the little braided tail? If not, you can tuck it behind, but this structure will leave you with a slightly diagonal edge where you start the braid and a tail at the other side.
Making a braid on a small tapestry
The finished braids from the front
How to make a braided or plaited edge for your tapestry
This technique came straight from Peter Collingwood’s book, The Techniques of Rug Weaving. I present one version of this here and in my own book, The Art of Tapestry Weaving. If you’d like to explore variations beyond what I’m showing here, take a look at Collingwood’s book. (Note that Collingwood wrote two books with very similar titles. The one with the edging information is the longer book.) I also have a video teaching this technique in most of my online classes, so if you’re in one, look in the finishing or bonus sections for a full review of how to do this.
The University of Arizona maintains an archive of some weaving books that are offered for free in PDF format with the permission of the author. This book is one of those. It is on THIS website page. There are five PDF files to see the whole book. Or you can look for a used copy of the book online or check your local library or guild. The information on rug finishes is in the fourth PDF from that site.
Steps to make a braid:
Place the tapestry FACE DOWN on a flat surface. This technique flips the warps up toward the weaving and if you do the braid face up, you’ll have all the warps in front of your work.
Decide how many warps you’re going to include in your braid. It should be at least 3 and can be any number greater than that. The more warps you include, the wider the braid will be.
Separate out the number of warps you are going to use in the braid starting at one edge.
Use the warp farthest to the left (or right) of that group to weave over and under the other warps in the group as seen in the photo below. You want the warp you’re weaving with to come out underneath the last warp in the group. That means you will have to change the over-under pattern for odd or even numbers of warps.
This is the secret sauce. Use a tapestry fork and push the edge of the braid you’re creating up toward the weaving. In the photo below at this point I would hold my fork in my right hand, stabilize the warps laying flat that are still unwoven, and push the woven warp upward toward the weaving. Do this on every single strand. If you don’t, your braid will be loose and messy. It helps to put a weight on the woven part of your tapestry.
Image from my book, The Art of Tapestry Weaving, page 271
When you reach the other side of your weaving, you’ll want to reserve warps to do a simple braid. The easiest braid is done in groups of three, so often I’ll take six warps in groups of two to make the tail and then use an overhand knot to finish it off.
In the photo below you can see the finished braid and how it turns the warps to the back of the weaving. I’ve used six strands of warp to do the final braid and tie the overhand knot.
Image from my book, The Art of Tapestry Weaving, page 271
What do you do with the warp tails from here?
I will needle in a warp or two right before that last braid tail to secure those ends since they are so close to the selvedge. I just run them up a warp channel and trim them off.
If you have quite a few ends in the braid, it will hold without doing anything further. But often on small pieces, there aren’t enough ends in the braid for that to happen and you need to secure those warp ends. I use my sewing machine with a thread matching the warp and stitch across the warp woven as weft section of the weaving. This secures those warps and then I trim them off to about 1/2 inch. If you don’t have a sewing machine you can use a simple whip stitch by hand to hold them down and then trim them a little longer. I teach this in my online classes.*
The image below is the finished braid from the front.
This image is from my book, The Art of Tapestry Weaving, page 271
I use this little braid a lot for my tapestry diary/sketch tapestry pieces and I used it for almost all of the examples in the Tapestry Discovery Box courses. It is a nice flat finish that is sort of casual and works well for mounting. It would also be a good choice for tapestries you might use functionally on a table because it is very flat.
*NEVER stitch with a sewing machine into the woven part of your tapestry. You won’t be able to get the stitching out and it will really show.
And if you’re new to tapestry weaving, the best online classes to get this information is either the Tapestry Discovery Box courses which are now being re-released or the Introduction to Tapestry Weaving course. The header photo in this post is the project from the first Tapestry Discovery course about weft bundling.